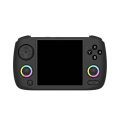
Onion OS is an alternative firmware for the Miyoo Mini Plus that enhances the console’s functionality and performance. It is recommended as a replacement for the standard firmware.
Preparation
- Ensure you have the latest version of the standard firmware installed. Instructions on how to update the standard firmware can be found here.
- You will need a computer/smartphone, a card reader, a memory card, and the console.
- Download the latest version of Onion OS from the official repository at GitHub. For example, to download Onion V4.2.0-beta-dev, click on the Assets button on the release page and select the file Onion-v4.2.0-beta-dev-41caa40.zip.
- Note that not all versions of Onion OS support the Miyoo Mini Plus. Typically, the version name indicates if it is not compatible with the Plus version.
Firmware Installation
- Format the memory card to FAT32. Instructions on how to format the card can be found here.
- Extract the firmware archive onto the memory card.
- Ensure the memory card contains the folders: tmp_update, BIOS, Media, miyoo, RetroArch, Themes.
- Insert the memory card into the console and power it on.
- Wait for the automatic installation of Onion OS, which will go through several stages.
Initial Setup
- After the installation, press the A button several times to enter the Package Manager menu.
- Enable the game emulators in the VERIFIED tab by pressing the A button. Recommended emulators include:
- Nintendo GBA (mGBA) – for GameBoy Advance games
- Nintendo NES (FCEUmm) – for NES games
- Nintendo SNES (Beetle Supafaust) – for SNES games
- Port Collection – for specific game ports
- Sega Genesis (PicoDrive) – for Sega MegaDrive/Genesis games
- Sony Playstation (PCSX ReARMed) – for PlayStation 1 games
- Additional emulators for other platforms include:
- Arcade (MAME 2003 Plus) – for arcade games
- Microsoft DOS (DOSBox-Pure) – for MS-DOS games
- Nintendo Game Boy (Gambatte) – for Game Boy games
- Nintendo Game Boy Color (Gambatte) – for Game Boy Color games
- SCUMM (SCUMMVM) – for SCUMM-based games
- Sinclair – ZX Spectrum (Fuse) – for ZX Spectrum games
- After enabling the emulators, go to the APPS tab and enable the necessary applications. Available apps include:
- Activity Tracker – tracks time spent on each game
- AdvanceMENU – advanced console menu
- Clock – clock emulation
- Display Calibration – screen, vibration, and button testing utility
- Ebook Reader – book reader
- Expert – adds a menu button for experimental emulators/consoles
- File Explorer – file manager
- FTP-Server – wireless data transfer
- Gallery – screenshot viewer
- GameSwitcher – game manager for switching between games
- Guest Mode – guest mode
- Web Files Browser – internet file browser
- List shortcuts – game filters
- Music Player – MP3 player
- Onion OTA update – OTA updates
- PDF Reader – PDF reader
- Quick Guide – Onion OS guide
- Random Game – random game selector
- RetroArch – quick access to RetroArch settings
- SSH – SSH server
- Search – game search tool
- Terminal – developer terminal
- ThemeSwitcher – theme switcher
- Tweaks – various tweaks (icons, menu buttons, interface)
- Video Player – video player
- After enabling all necessary applications, go to the SUMMARY tab, review the list, and press the START button on the console.
Loading BIOS
- BIOS files are required for most emulators. Without them, games will not start.
- In the stock firmware, they are located in the RetroArch/.retroarch/system folder. In Onion OS, place the files in the /BIOS/ folder.
- Extract the BIOS archive into the appropriate folder on the memory card.
Installing Games/ROMs
- Most ROMs are placed in the Roms directory of the respective emulator:
- GameBoy – /Roms/GB/
- GameBoy Color – /Roms/GBC/
- GameBoy Advance – /Roms/GBA/
- Sega MegaDrive/Genesis – /Roms/MD/
- PSone – /Roms/PS/
- SNES – /Roms/SFC/
- NES – /Roms/FC/
- For most emulators, games can be stored in zip archives. For PS one, it is better to use the .chd format for good compression.
- If games do not appear, press the MENU button and select Refresh roms. This procedure should be repeated after loading new games onto the memory card.


